Connecting a Computer to a Network in Windows 10: A Comprehensive Guide
Related Articles: Connecting a Computer to a Network in Windows 10: A Comprehensive Guide
Introduction
With enthusiasm, let’s navigate through the intriguing topic related to Connecting a Computer to a Network in Windows 10: A Comprehensive Guide. Let’s weave interesting information and offer fresh perspectives to the readers.
Table of Content
- 1 Related Articles: Connecting a Computer to a Network in Windows 10: A Comprehensive Guide
- 2 Introduction
- 3 Connecting a Computer to a Network in Windows 10: A Comprehensive Guide
- 3.1 Understanding Network Types
- 3.2 Connecting to a Wired Network
- 3.3 Connecting to a Wireless Network
- 3.4 Configuring Network Settings
- 3.5 Troubleshooting Network Connections
- 3.6 Benefits of Connecting to a Network
- 3.7 FAQs about Connecting to a Network in Windows 10
- 3.8 Tips for Connecting to a Network in Windows 10
- 3.9 Conclusion
- 4 Closure
Connecting a Computer to a Network in Windows 10: A Comprehensive Guide
Connecting a computer to a network is a fundamental step in modern computing, enabling access to shared resources, communication, and a wealth of online services. Windows 10, the latest version of Microsoft’s operating system, provides a user-friendly interface and robust tools for establishing network connections. This comprehensive guide will delve into the process of connecting a computer to a network in Windows 10, covering various network types, configuration steps, and troubleshooting tips.
Understanding Network Types
Before embarking on the connection process, it is crucial to understand the different types of networks available:
- Home Networks: Typically used in residential settings, home networks connect multiple devices, such as computers, printers, and smartphones, within a single location. These networks are often based on Wi-Fi or wired Ethernet connections.
- Office Networks: Designed for businesses and organizations, office networks connect computers, servers, and other devices within a workplace. These networks often use a combination of wired and wireless connections, with robust security measures in place.
- Public Networks: Found in public spaces like coffee shops, airports, and libraries, public networks offer internet access to anyone within range. While convenient, these networks are generally less secure and should be used with caution.
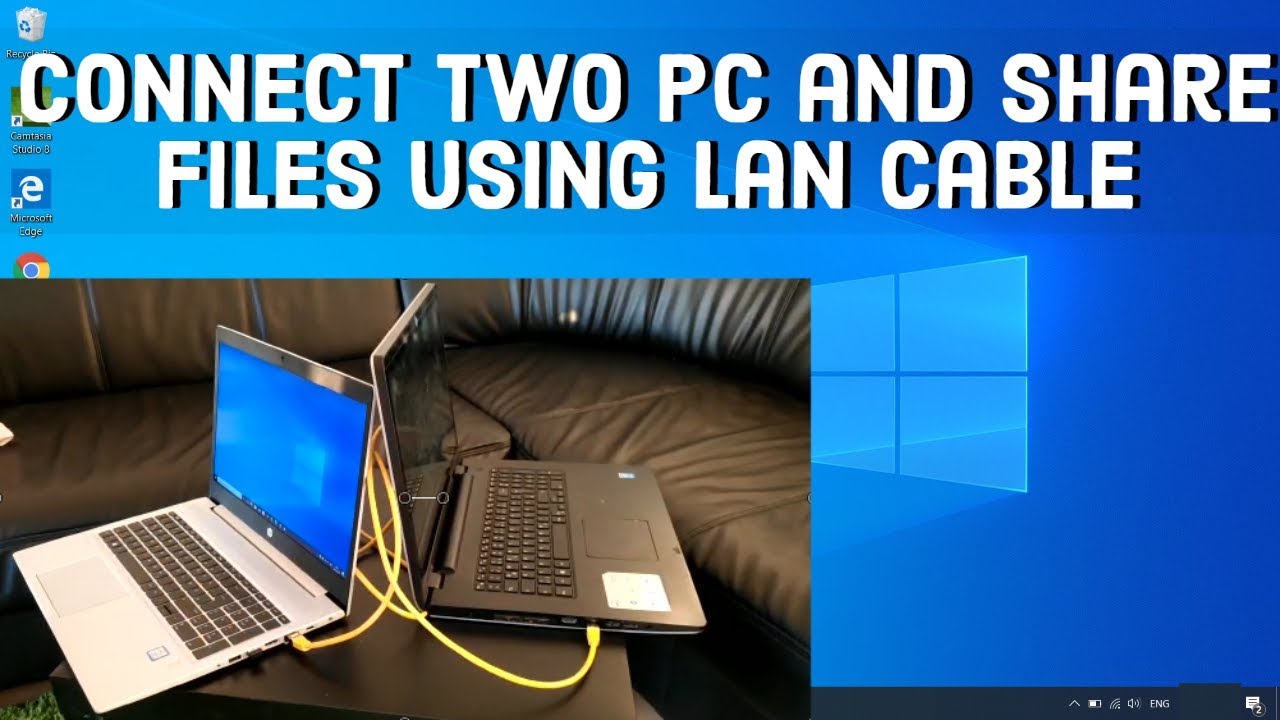
Connecting to a Wired Network
Connecting to a wired network is a straightforward process that involves physically plugging your computer into a network switch or router using an Ethernet cable. Here’s a step-by-step guide:
- Locate the Ethernet port: Most computers have an Ethernet port located on the back or side of the device. It typically resembles a large rectangular socket.
- Connect the Ethernet cable: Connect one end of the Ethernet cable to the Ethernet port on your computer and the other end to the network switch or router.
- Windows will automatically detect the network: Windows 10 will automatically detect the wired network and attempt to connect. If the network is password protected, you may be prompted to enter the password.
- Verify the connection: Once connected, you can verify the network connection by checking the network icon in the system tray. The icon should display a connected status.
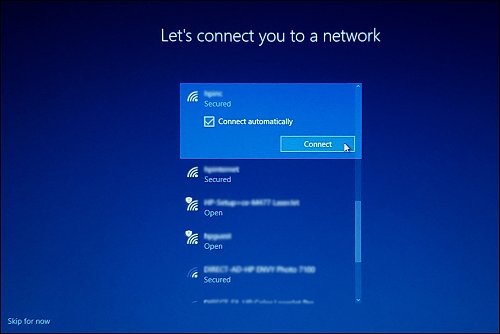
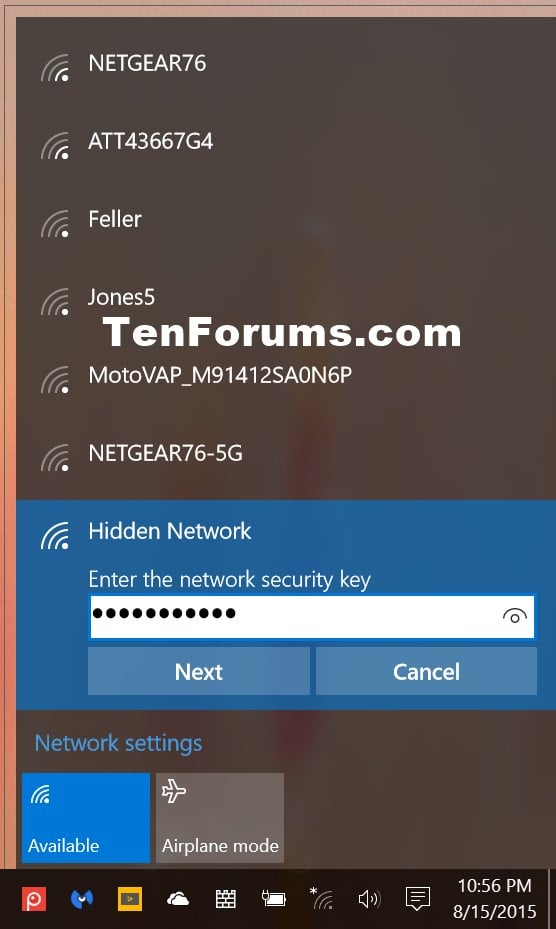
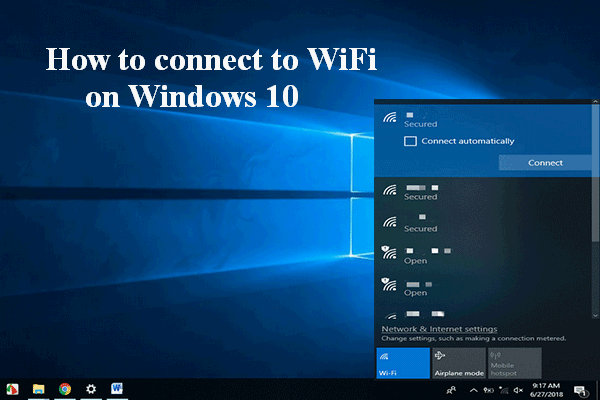
Connecting to a Wireless Network
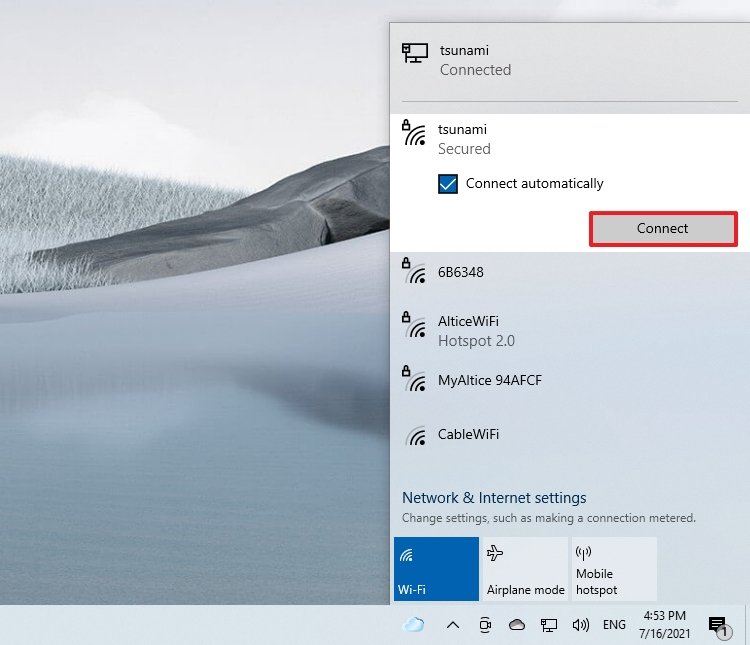
Connecting to a wireless network requires a Wi-Fi adapter in your computer and a wireless router broadcasting the network signal. Follow these steps to connect:
- Enable Wi-Fi: Ensure that your computer’s Wi-Fi adapter is enabled. This can usually be done by clicking the network icon in the system tray and selecting "Turn Wi-Fi on."
- Scan for available networks: Click the network icon and select "Show available networks." Your computer will scan for nearby Wi-Fi networks.
- Select the desired network: Choose the network you want to connect to from the list of available networks.
- Enter the network password: If the network is password protected, you will be prompted to enter the password.
- Connect and verify: Once the password is entered, Windows 10 will attempt to connect to the network. Verify the connection by checking the network icon in the system tray.
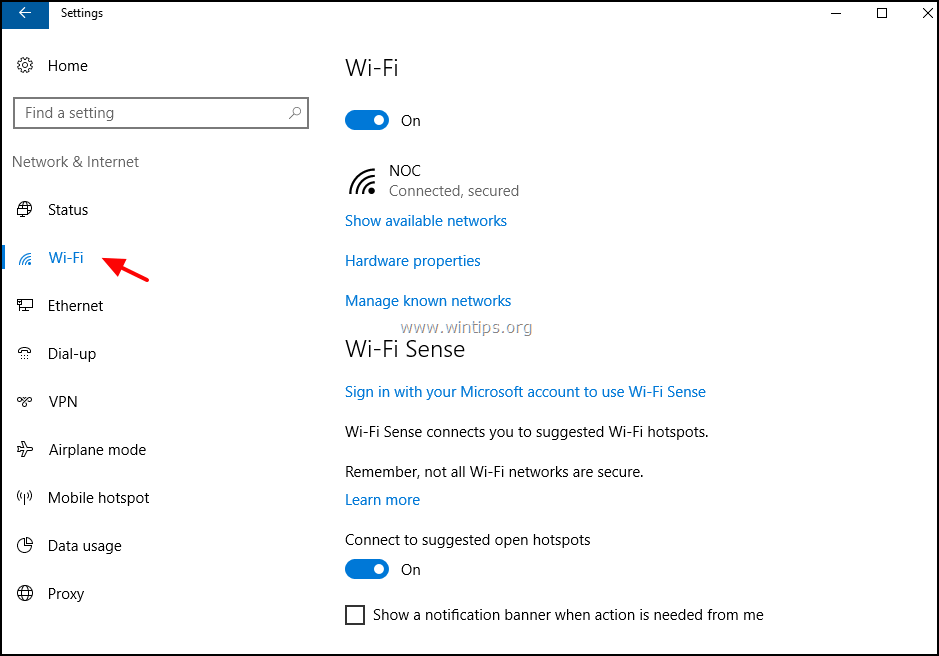
Configuring Network Settings
Windows 10 provides a comprehensive set of network settings that allow you to customize your network connection according to your needs. You can access these settings by navigating to "Settings" > "Network & Internet."
Network Sharing: This section allows you to configure how your computer shares files and printers with other devices on the network.
Private Network: When connected to a home or office network, Windows 10 typically designates it as a private network, enabling sharing and other features.
Public Network: If connected to a public network, Windows 10 may designate it as a public network, limiting sharing and restricting access to certain features.
Network Adapter Settings: This section provides detailed information about your network adapters, including their status, connection type, and network properties.
Troubleshooting Network Connections
While connecting to a network is generally straightforward, occasional issues may arise. Here are some common troubleshooting tips:
- Check the network cable: Ensure that the Ethernet cable is securely plugged into both your computer and the network switch or router.
- Restart the router: Restarting the router can resolve temporary network issues.
- Update network drivers: Outdated network drivers can cause connection problems. Update your network drivers by going to "Device Manager" and updating the drivers for your network adapter.
- Check the network password: Verify that you have entered the correct password for the network.
- Disable and re-enable Wi-Fi: Sometimes, disabling and re-enabling Wi-Fi can resolve connectivity issues.
- Run the Network troubleshooter: Windows 10 includes a built-in network troubleshooter that can automatically diagnose and fix common network problems.
Benefits of Connecting to a Network
Connecting a computer to a network offers numerous benefits:
- File sharing: Easily share files and folders with other devices on the network.
- Printer sharing: Access and print to network printers from multiple computers.
- Internet access: Connect to the internet and access online services.
- Communication: Communicate with other devices on the network, such as through email or instant messaging.
- Remote access: Access your computer remotely from other devices on the network.
- Network security: Benefit from the security measures implemented by the network administrator.
FAQs about Connecting to a Network in Windows 10
Q: What is a network adapter?
A: A network adapter is a hardware component that enables your computer to communicate with other devices on a network. It can be either wired (Ethernet) or wireless (Wi-Fi).
Q: What is a network password?
A: A network password is a security measure that prevents unauthorized access to the network. It is typically set by the network administrator.
Q: What is the difference between a private and a public network?
A: A private network is typically found in a home or office setting and allows for sharing of files and other resources. A public network is found in public places and typically offers internet access but limits sharing and security features.
Q: How do I change my network name?
A: You can change your network name by going to "Settings" > "Network & Internet" > "Wi-Fi" and selecting "Edit" next to your network name.
Q: What is a network troubleshooter?
A: A network troubleshooter is a tool that can automatically diagnose and fix common network problems. You can access the troubleshooter by going to "Settings" > "Network & Internet" > "Status" and selecting "Network troubleshooter."
Tips for Connecting to a Network in Windows 10
- Use a strong password: When creating a network password, choose a strong password that is difficult to guess.
- Enable network security: Enable network security features, such as encryption and firewalls, to protect your network from unauthorized access.
- Keep your network drivers up-to-date: Regularly update your network drivers to ensure optimal performance and security.
- Use a reputable antivirus program: Protect your network from malware by installing a reputable antivirus program.
- Backup your data: Regularly back up your important data to protect against data loss.
Conclusion
Connecting a computer to a network is an essential step in modern computing, providing access to a wide range of benefits. Windows 10 offers a user-friendly interface and robust tools for establishing network connections, making the process straightforward and efficient. By understanding network types, configuration steps, and troubleshooting tips, users can confidently connect their computers to networks and enjoy the numerous benefits they offer.

/Windows10connecttaskbar-599485c1b501e80012936da2.JPG)
Closure
Thus, we hope this article has provided valuable insights into Connecting a Computer to a Network in Windows 10: A Comprehensive Guide. We appreciate your attention to our article. See you in our next article!